Follow Me On Social Media!
Modern Birthday Cakes That Are Trending in 2026: The Mirror Glaze Dream Cake You Need to Try
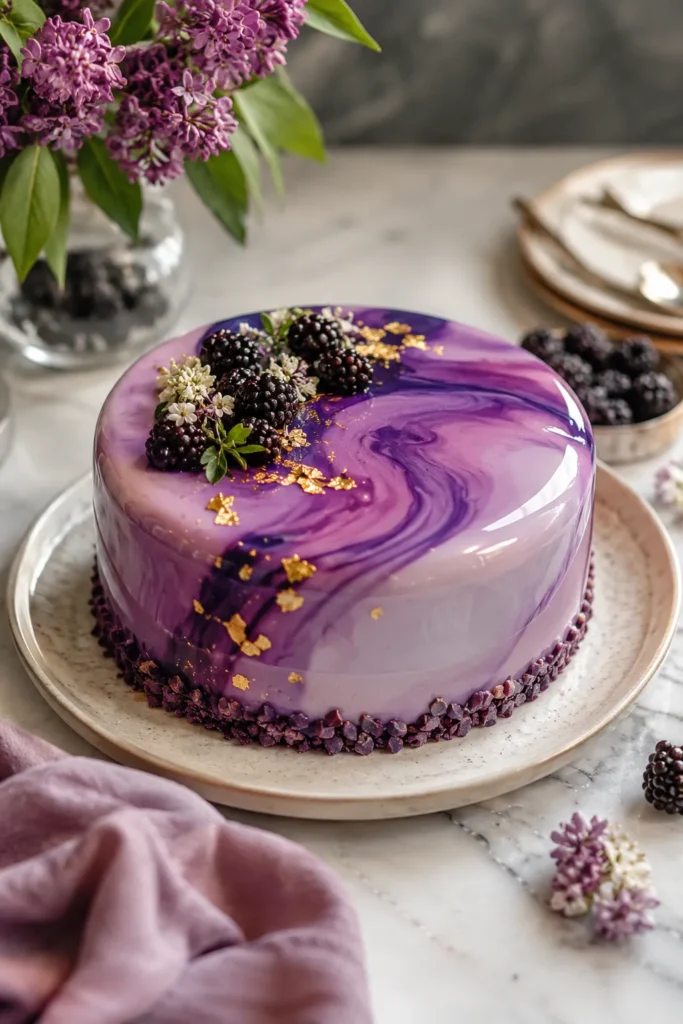
If you’ve been scrolling through Pinterest or Instagram lately, you’ve probably stopped mid-scroll at least once to stare at a cake that looked almost too beautiful to be real. A surface so shiny it reflects your face like a mirror, colors swirling together in waves of chocolate and caramel — almost hypnotic. That right there is the Mirror Glaze Birthday Cake, and it is the cake dominating 2026 birthday celebrations everywhere.
Among all the modern birthday cakes that are trending in 2026, this one stands out not just because of how stunning it looks, but because of how surprisingly doable it is when you understand the process. Yes, it looks like it came from a Michelin-starred pastry kitchen. But with the right guidance, you can absolutely make this at home — and it will taste just as incredible as it looks.
Save this recipe now, because you’re going to want to come back to it again and again.
Why Mirror Glaze Birthday Cakes Are Everywhere in 2026
The food world in 2026 is all about the intersection of drama and deliciousness. People want cakes that feel like an event, not just a dessert. The mirror glaze cake delivers on every level — it’s visually jaw-dropping, deeply customizable, and when made right, it’s moist, rich, and layered with flavor in ways that a simple frosted cake just can’t compete with.
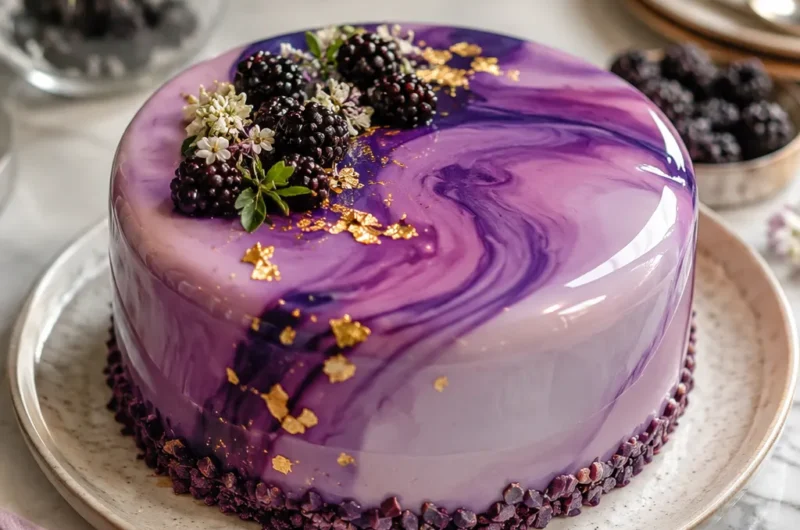
What makes it special from a trend perspective is how versatile it is. You can go bold with jewel tones — deep burgundy, midnight blue, forest green — or keep it ethereal with pastels that melt into each other like a watercolor painting. No two cakes look the same, which means it feels personal and handcrafted every single time.
Beyond the aesthetics, the mirror glaze cake has become a symbol of celebratory effort. It says: someone really cared enough to make this for you. And in a world where we’re all trying to be more intentional with our celebrations, that message hits differently.
The Recipe: Chocolate Mirror Glaze Birthday Cake
What to Expect
At its heart, this is a moist, layered chocolate sponge cake filled with silky whipped ganache, coated in a smooth mirror glaze that sets to a glass-like finish. The chocolate base is rich and not overly sweet, which balances perfectly with the glossy glaze. Every bite gives you that deep cocoa warmth, a slight bitterness from the dark chocolate, and a creamy sweetness from the filling. It’s genuinely one of the most satisfying things you’ll ever eat at a birthday table.
This is a homemade food project that rewards patience. Set aside a full day — it’s not a quick meal, but every single minute is worth it.
Ingredients
How to Make Soft Chocolate Chip Cookies Step by Step
Servings
24
servingsPrep time
15
minutesCooking time
12
minutesCalories
180
kcalTotal time
27
minutesYou can’t go wrong with chocolate chip cookies — buttery, gooey in the center, perfectly golden on the edges, and loaded with melty chocolate in every bite.
Ingredients
2 ¼ cups (280g) all-purpose flour
1 tsp baking soda
1 tsp fine salt
1 cup (225g) unsalted butter, softened
¾ cup (150g) granulated sugar
¾ cup (165g) packed brown sugar
2 large eggs, room temperature
2 tsp pure vanilla extract
2 cups (340g) semi-sweet chocolate chips
Directions
- Preheat your oven to 375°F (190°C). Line two baking sheets with parchment paper and set aside.
- Whisk together the flour, baking soda, and salt in a bowl. Set aside.
- Beat the softened butter with both sugars until light and fluffy, about 3–4 minutes. Add the eggs one at a time, then stir in the vanilla.
- Gradually mix in the flour mixture until just combined. Fold in the chocolate chips. Drop rounded tablespoons onto the baking sheets and bake 10–12 minutes until golden. Cool on the pan for 5 minutes before transferring.
Notes
- For extra thick cookies, chill the dough for 30 minutes before baking. Don’t overbake — they’ll look slightly underdone when you pull them out, but they firm up perfectly as they cool on the pan.
Step-by-Step Preparation
Step 1: Bake the Chocolate Sponge Layers
Preheat your oven to 350°F (175°C). Grease and line three 8-inch round cake pans with parchment paper. In a large mixing bowl, whisk together the flour, sugar, cocoa powder, baking soda, baking powder, and salt until fully combined — no lumps hiding in there.
In a separate bowl, whisk together the eggs, buttermilk, hot coffee, vegetable oil, and vanilla extract. Pour the wet ingredients into the dry ingredients and mix with a spatula or hand mixer on low speed until the batter is just smooth. It will be thinner than typical cake batters — that’s exactly right. Divide evenly among the three pans and bake for 28–32 minutes, or until a toothpick inserted in the center comes out with just a few moist crumbs. Let the layers cool completely in the pans for 15 minutes before turning out onto a wire rack. Cool fully before assembling — at least two hours, or overnight in the refrigerator wrapped in plastic.
Step 2: Make the Whipped Ganache Filling
Place the finely chopped dark chocolate in a heatproof bowl. In a small saucepan, heat the cream over medium heat until it just begins to simmer — small bubbles forming around the edges. Pour the hot cream over the chocolate, add the butter and salt, and let it sit undisturbed for three full minutes. Then stir slowly from the center outward until you have a glossy, perfectly smooth ganache. Let it cool at room temperature for about an hour, then refrigerate for 30 minutes until it thickens to the texture of thick yogurt. At that point, whip it with a hand mixer on medium-high for 2–3 minutes until it becomes light, airy, and spreadable — almost mousse-like in texture. It should hold soft peaks.
Step 3: Assemble and Freeze the Cake
Place one cake layer on a cardboard cake round set on a wire rack over a sheet pan (this setup is key for the glazing step later). Spread a generous, even layer of whipped ganache over the top — about ¾ inch thick. Add the second layer, press gently, then repeat with more ganache. Add the third layer and use the remaining ganache to create a very thin, even coating over the entire cake — top and sides. This is called a “crumb coat” and it creates the smooth, even surface the glaze needs to pour beautifully. Refrigerate for 30 minutes, then add a second, slightly thicker smooth coat of ganache. Use an offset spatula or bench scraper to make the sides as flat and even as possible — the smoother the surface, the more stunning the mirror glaze will look.
Place the finished cake on the wire rack in the freezer for at least 4 hours, or overnight. The cake needs to be very cold — nearly frozen — for the glaze to set properly when poured.
Step 4: Make and Pour the Mirror Glaze
Bloom the gelatin: sprinkle the gelatin powder over 75ml of cold water in a small bowl and let it sit for 5 minutes until it absorbs the liquid and becomes spongy.
In a saucepan, combine the sugar and remaining 75ml of water. Bring to a boil over medium heat, stirring just until the sugar dissolves, then stop stirring. Add the condensed milk and stir to combine. Remove from heat and add the bloomed gelatin, stirring until fully melted. Pour this hot mixture over the finely chopped white chocolate and let it sit for 2 minutes, then stir from the center outward until completely smooth. Strain through a fine-mesh sieve to remove any lumps.
Now for the fun part: divide the glaze into two or three bowls and add gel food coloring to each — stir gently to combine. Allow the glazes to cool to exactly 90–95°F (32–35°C); use a kitchen thermometer here, because temperature is everything. Too hot and it’ll slide right off; too cool and it won’t flow beautifully.
Take the frozen cake out of the freezer and set it on the wire rack over the sheet pan. Simultaneously pour all of your colored glazes from height — overlapping them, letting them blend and swirl as they cascade down the sides. Don’t touch them; let gravity do the work. Within 30 seconds, the glaze will begin to set on the cold cake surface and you’ll have that perfect mirror finish. Let it drip and set for five minutes, then gently transfer the cake to a serving board or plate using two large spatulas or a cake lifter.
Refrigerate the finished cake for at least one hour before slicing to allow the glaze to fully set and the inside to come to a perfect eating temperature.
Cooking Tips for Better Results
Getting your mirror glaze right is about precision and patience. A few things to keep in mind:
- Temperature is your best friend. The glaze must be between 90°F and 95°F when you pour. Too warm and it slides off; too cool and it sets before flowing. Use a candy or instant-read thermometer — it’s non-negotiable.
- Freeze, don’t just chill. The cake must be nearly frozen for the glaze to set on contact. A refrigerator-cold cake will not give you the same result.
- Quality chocolate matters. The white chocolate base of your glaze needs to be good quality — cheap white chocolate can make the glaze taste overly sweet and can affect the shine.
- Gel food coloring only. Liquid food coloring will thin your glaze and affect the finish. Always use concentrated gel colorings.
- A smooth ganache coat is essential. The glaze is transparent and will show every bump and ridge underneath. Take your time with the crumb coat.
Common Mistakes to Avoid
Most glaze disasters come down to a handful of very fixable mistakes. Don’t let these trip you up:
- Pouring the glaze too early. If the cake isn’t frozen, the glaze runs off before it sets.
- Skipping the thermometer. Eyeballing the glaze temperature is how you end up with a mess.
- Not straining the glaze. Any air bubbles or lumps show up prominently on that mirror surface.
- Overcrowding colors. Three colors maximum — four or more tends to muddy together and lose that beautiful swirled effect.
- Cutting the cake while the glaze is still tacky. Wait for it to fully set in the refrigerator, or you’ll drag the glaze and lose the finish at the cut edge.
How to Save Time and Money Making This Cake
This is a budget cooking dream if you plan ahead. Here’s how to make it efficient:
- Bake the cake layers up to three days ahead and store them wrapped tightly in the refrigerator, or freeze them for up to a month.
- Make the ganache filling the day before and store it covered in the refrigerator. Re-whip briefly before using.
- Buy white chocolate in bulk — it’s the base of the glaze and you’ll want extra for future attempts (and yes, you will want to make this again).
- Use the glaze drippings that fall onto the sheet pan — they can be melted gently, rewarmed to the right temperature, and used again on future cakes.
Spreading the work across two or three days makes this feel completely manageable, even on a budget cooking schedule.
Flavor Variations Worth Trying
Once you’ve mastered the base recipe, the possibilities open up beautifully. Swap the whipped dark ganache filling for salted caramel buttercream for a completely different flavor profile. Add a layer of fresh raspberries between the cake layers for a fruity brightness that cuts through the richness of the chocolate. For a more indulgent version, brush each cake layer with a tablespoon of espresso or Kahlúa before adding the filling — it deepens the chocolate flavor in the most wonderful way.
The glaze itself can be flavored too: a small amount of peppermint extract in a dark-colored glaze makes a stunning winter birthday cake.
Best Occasions to Serve This Recipe
Honestly? Any occasion where someone deserves to feel truly celebrated. The mirror glaze birthday cake is perfect for milestone birthdays — the big 30, 40, 50 — where you want the cake to match the occasion’s significance. It’s equally beautiful at gender reveal parties, graduation celebrations, anniversary dinners, and even as a showstopping holiday dessert.
It’s one of those cakes that makes a room go quiet when it comes out, then immediately fills the air with gasps and phone cameras. That moment alone is worth every step of the process.
A Final Word
Modern birthday cakes that are trending in 2026 are all about creating an experience — not just a dessert. And the Mirror Glaze Birthday Cake does exactly that. It is, without question, a delicious recipe that brings together artistry, skill, and a whole lot of joy. Whether you’re making it for someone you love or treating yourself to the baking project you’ve always wanted to try, this cake will not disappoint.
Try it today. Take your time with it. And when you finally pour that glaze and watch it cascade down the sides like liquid silk, you’ll understand why this is the most-talked-about homemade food moment of the year. You’ll love this flavor, you’ll love the process, and you’ll absolutely love the look on everyone’s face when they see it.
Happy baking.